
SAP provides function to develop form by using SMARTFORMS. This form is generally used to issue Receipt, Voucher, Purchase Form and etc. These forms always have header and footer. In SAP, we can generate header and footer by adding Graphics into SMARTFORMs. This tutorial will show how to add Graphics into SAP.

1. Prepare your header and footer in BMP file (Bitmap)
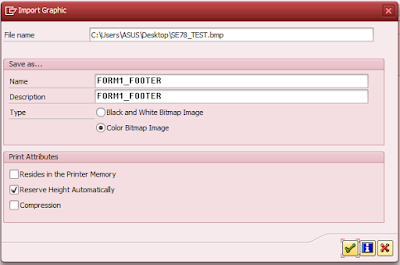
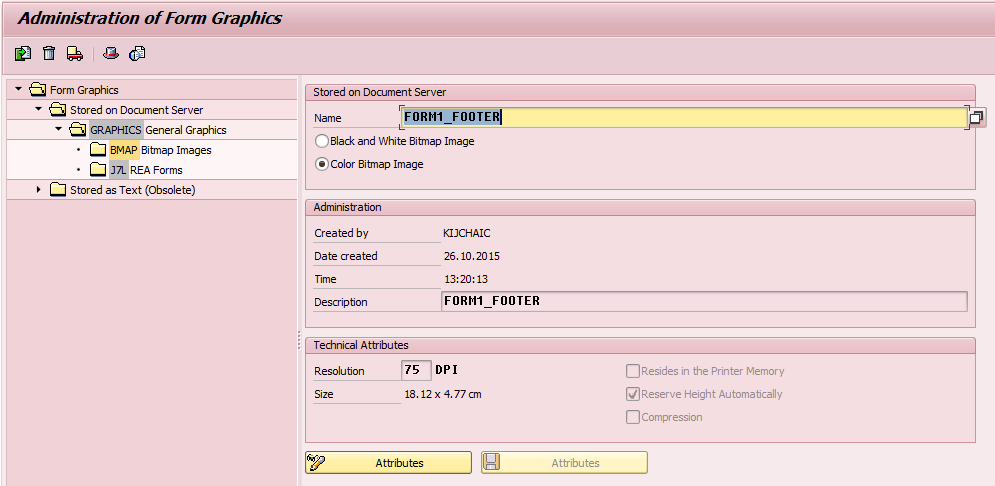
2. Import into SAP
1. Resolution in SAP should match with your prepared files. Otherwise, you will have a problem about size of Graphics. Common resolution is 150 DPI. You can define your Graphics’ resolution by using Adobe Photoshop.

2. Sometimes you upload Graphics into SAP and background of Graphics is changed to grey. Here is how to fix problem with grey background in SMARTFORMs

2.1 Open your Graphics with program “Paint”
2.2 Click “Save as” and choose Save as type “256 Color Bitmap”.

2.3 Upload into SAP again.

Label: How to use SE78 in SAP, How to upload image to SAP, SE78 grey background, Upload bitmap image to SAP, SE78 in SAP, add logo through SE78 in SAP, SE78 download image, SE78 Transport
Transaction Code: SE78

1. Prepare your header and footer in BMP file (Bitmap)
2. Import into SAP

Tips
1. Resolution in SAP should match with your prepared files. Otherwise, you will have a problem about size of Graphics. Common resolution is 150 DPI. You can define your Graphics’ resolution by using Adobe Photoshop.
2. Sometimes you upload Graphics into SAP and background of Graphics is changed to grey. Here is how to fix problem with grey background in SMARTFORMs

2.2 Click “Save as” and choose Save as type “256 Color Bitmap”.

2.3 Upload into SAP again.

How to delete, download and transport image will be continued in Part II and Part III soon.
Label: How to use SE78 in SAP, How to upload image to SAP, SE78 grey background, Upload bitmap image to SAP, SE78 in SAP, add logo through SE78 in SAP, SE78 download image, SE78 Transport
Tags:
General Setting