How to use MIRO?
Transaction Code: MIRO
Logistics >> Materials Management >> Logistics Invoice Verification >> Document Entry >> MIRO - Enter Invoice
1. Select company code
This is important. You will see that there is no company code in initial screen. If purchase order is not match with default company code, system will not allow you to post MIRO. So, you have to check company code before enter purchase order.
2. Enter currency, tax code and purchase order
SAP allows you to change invoice currency. Purchase Order may issue in USD. But you able to record invoice in EUR by change currency here. One more sensitive field is tax code. You have to select tax code before enter purchase order. Otherwise, you have to change tax code of each item instead of change at header of document.
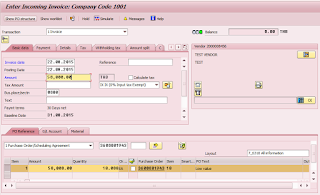
3. Enter amount and quantity of purchase item
After purchase order is entered, program automatically select available item in purchase order. You have to check amount and quantity here. Amount is allowed to overwrite. The excess amount will be record to expense/material as maintain in purchase order.
4. Enter invoice amount
At the top of screen, there is red mark to warn that amount is not balance. System also show unassigned amount there. What you have to do is to enter invoice amount and make it balance. Green mark will be appeared and unassigned amount will be zero.
5. Simulate and post
You can simulate account posting to check amount before post. Once you posted document, system show document number at bottom left. It’s a material document number.
6. Display financial document
Financial document is automatically generated by system. Easy way to find financial document is to display material document and press <follow-on document>. Financial document number will be shown there.
If you miss document number at bottom left of screen, don’t worry. You can go to TCode “MIR4” to display material document.
Label: How to use MIRO in SAP, How to post MIRO in SAP, MIRO manual in SAP, MIRO step-by-step in SAP, MIRO document in SAP.


