Big update today about dunning process. Before this I had wrote about dunning procedure configuration. Today, I update about how to execute SAP dunning via transaction code "F150". I start from explanation what is the usage of dunning in SAP, continue with dunning process and how to execute dunning in SAP. Hope this journal is useful.
2 more days for weekend !! FIGHT !!
Share if you like Share
SAP Dunning
Sometimes customers fall behind on payments. In this case, you can generate dunning letter to send to them for reminding of outstanding debts.
Dunning Process
1. Billing document is issue and customer invoices is generated in system.
2. Dunning programs selects all of overdue documents based on criteria in selection screen.
3. Dunning program determines dunning level of each document. Normally, system groups data based on vendor/customer and dunning level. In case of you need specify grouping, you can do a setting of dunning group in dunning configuration.
4. Program generates dunning notice. Format and layout of dunning notice is based on dunning text that you assign to dunning procedure. Normally, dunning text is developed as SMARTFORMs. So, this case you need ABAPer to develop first and then assign in dunning procedure configuration.
How to use F150 in SAP
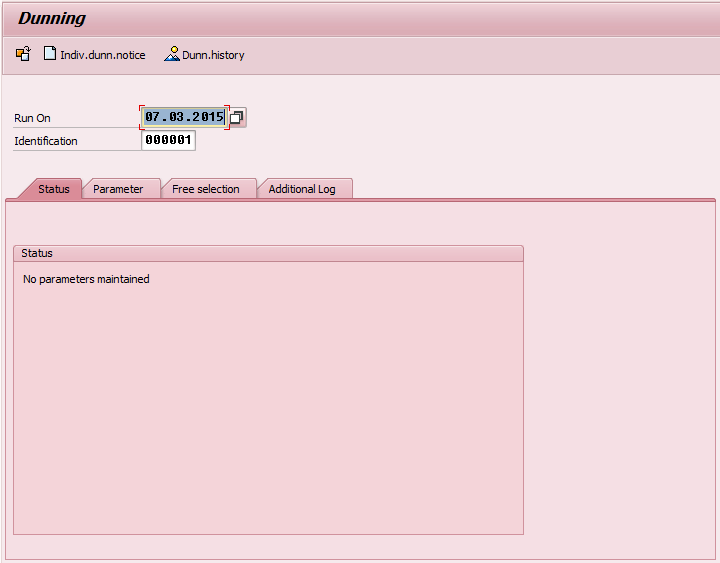
1. Define Run Date and Identification
Run Date and Identification are the keys of each execution.
2. Enter parameter for dunning.
Tab 'Parameter'
Dunning date: Enter date that you need system to calculate number of overdue of each document. This parameter effects to dunning level.
Document posted up to: The date on which document is posted. Only documents which have been posted up to this date are included in this processing.
Company code: Only documents which have been posted in this company are included in this processing.
Customer: Only documents which have been posted to customer in this list are included in this processing.
Vendor: Only documents which have been posted vendor in this list are included in this processing.
Tab 'Free selection'
In this tab, you can limit system to select only documents that you need. This step, you can define select condition by choosing any field in document (actually, they are field in table BSID and BSIK). Then, enter the value of field that you need to create selecting condition.
There are 3 ways to enter value in “Free selection” tab. First is single value. This is to enter only 1 values such as enter only one document number. Second is to enter value as range. When you need to enter value as range, you have to maintain in pattern like “(from, to)”. The last ways is to enter several values. Comma is the sign that SAP know as separator. So, you have to enter like this “value1, value2, value3”.
Tab 'Additional log'
Additional log is use to scope vendor/customer that you need system to generate log. The important of log is for data analysis. Sometimes you may see result that some documents are not in dunning proposal. The easiest way to find reason for missing document is to open dunning log. So every time that you execute dunning, please make sure that all vendor/customer are maintained in “Additional log”.
3. Execution
Press <schedule button> on the top left. System pop-up new screen asking for output device.
After enter output device, system ask for job scheduling. You just select "start immediately" to let system start execution.
Wait until system finishes processing. You will see many buttons appears.
Log Button: You can click this button to check how system determine dunning document.
Dunning List: You can click this button to call standard dunning report. Below is a sample of standard dunning report.
4. Print-out dunning notice
How system calculate dunning level
Dunning level is a configuration in dunning proce
dure. First, you have to know what is setting in your current dunning procedure. Assume that dunning procedure is setting as below:
Dunning Level 1 = Due Date
Dunning Level 2 = 30 days overdue
Dunning Level 3 = 60 days overdue
Dunning Level 4 = 90 days overdue
Net due date of document is on 4 February 2015.
Dunning date is on 7 March 2015.
The easiest way to count days after due date is to call report FBL1N/FBL5N. In this report, you can change report layout to add field “net due date” and “arrear after net due date”.
From sample above, these 2 documents overdue for 31 days. These documents will be determined as dunning level 3 (over 30 days but not over 90 days).
Related Table
MHNK – Store data at level of grouping by dunning level, dunning are and vendor/customer.
MHND – Store data at level of document. You can find all documents number and some detail of each document in this table.
Related Topic
Label : SAP Dunning F150, How to use dunning in SAP, How to use F150 in SAP, What is dunning in sap, how dunning work in SAP, SAP Dunning manual, How to use Dunning F150 in SAP.


